|
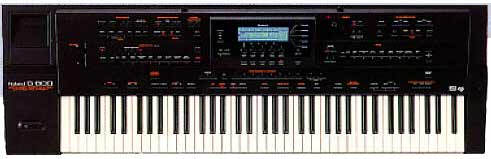
ROLAND G-800
The G-800 is the first of a new generation of Roland Arranger Workstations.
It is ideal for one-man bands, songwriters, and is perfect to enjoy a wide variety of Music Styles and Standard MIDI Files at home.
The G-800 features 689 Tones, 64-notes polyphony, 128 Music Styles, 192 Performance Setups and a new 76-note keyboard.
The 8-Track Music Style Recorder lets you create your own Music Styles, and it also features direct-to-disk recording/playback of SMFs. The G-800 is 32 part multi-timbral with two MIDI ports, and features built-in reverb, chorus, delay and EQ.
Initializing
1) Hold WRITE, and turn the power on.
Selecting Tones
1) Press UPPER 1 under the display.
2) Press GROUP A-D, (in the Tone area) to select the desired group of the instruments.
3) Press Bank and Tone 1-8 to select the Bank.
4) Press Tone 1-8 again to select the Tone.
5) Press VARIATION to select a variation Tone.
Selecting Music Styles
1) Press GROUP A-B in the Music Style area.
2) Press BANK.
3) Press Music Style 1-8 to select a Bank.
4) Press Music Style 1-8 to select a Music Style.
Setting Split Points - Up to 3 Zones The G-800 can have up to three key zones and transmit on three MIDI channels simultaneously.
1) Press SPLIT.
2) Press UPPER1 and UPPER2 (under Keyboard
Mode) for two zones, also press LOWER for
three zone split. The buttons will be lit.
3) Press F2.
4) Press PAGE down to select page #2.
5) Use DRUMS rotary knob to choose split point.
For three zone split, use the ACCOMP rotary
knob to choose the additional split point.
Layering Tones
To layer two Tones across the whole keyboard:
1) Press UPPER1 under Keyboard Mode.
2) Press UPPER2 under Keyboard Mode.
3) Press WHOLE RIGHT.
4) Press SYNCHRO START so it is off.
Storing Performances in Memory
You can save selected and edited Tones, Music Styles, Split Points, and Effect Settings into a Performance Memory.To store your setup:
1) Press WRITE.
2) Press UPPER1 (under the display) to turn the memory protect OFF, if it is on.
3) Hold WRITE and press GROUP A-C in the Performance Memory area.
4) Continue to hold WRITE and press BANK.
5) Press PERFORMANCE MEMORY 1-8 for the Bank value.
6) Press PERFORMANCE MEMORY 1-8 for the Number value.
Saving and Loading data to Disk
You can save created Music Styles, Style Sets, MIDI Sets, Chord Sequences and Performances on the floppy disk.
1) Press F5.
2) Press F1 for Load or F2 for Save.
3) Press PAGE to select the type of data to Load/Save.
4) Press UPPER1 in the display area to Load; press MBASS to Save.
Playing Standard MIDI Files
1) Insert the disk.
2) Press GM/GS.
3) Press SONG SELECT Previous or Next to select the desired song title.
4) Press PLAY.
5) If the SMF includes lyrics, press F4 to view the lyrics in the display.
Editing Tones
You can edit the tones of the RealTime Parts as Upper, Upper2, Lower, M.Bass or M. Drums:
1) Press Tone in the display area.
2) Press F4 Edit.
3) Select the Part with the DRUM rotary knob.
4) Select the parameter with the ACCOMP knob.
5) Adjust the value of the parameter with the
UPPER rotary knob.
Options
FC-7 MIDI Foot Controller, PK-5 Dynamic MIDI Pedal, FV-300L Expression Pedal, DP-6/2 Pedal Switch, MSD-Series Style Disks.
|
|